Engine Control Module with Protective Housing
Engine Control Module with Protective Housing
Special tools, testers and auxiliary items required
• Die Grinder
• If it is necessary to replace the Engine Control Module, connect the vehicle diagnostic tester and perform "Replace control module".
• Shear bolts attach the protective housing. It is not possible to remove the shear bolts without damaging them. Use a die grinder or a cutting grinder to remove the shear bolts. Replace the protective housing if it gets damaged.
Removing
- Turn off the ignition.
- Remove the air filter housing. Refer to => [ Air Filter Housing ] Air Filter Housing.
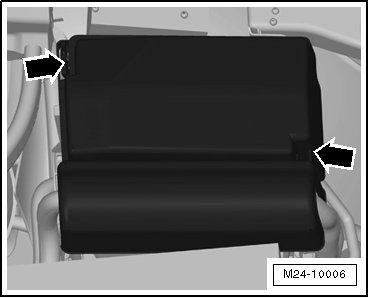
- Remove the E-box cover inside the engine compartment - arrows -.
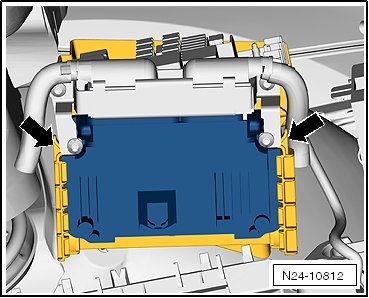
- Free up the wiring harness and pull the ECM upward out of its mount. Push the locking mechanisms - arrows - to the side.
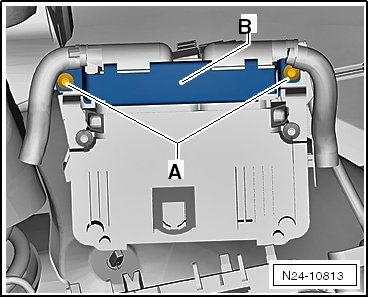
- Remove the bolts - A -. Push the wiring harness as far as possible to the side. Remove the locking mechanism - B -.
- Unlock the connector and pull it off the ECM.
Installing
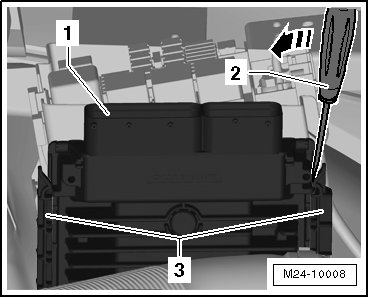
- Install the ECM - 1 - into the guides - 3 - until it locks.
- If the ECM was replaced, then attach the bracket - 4 - to the ECM with new shear bolts - 6 -.
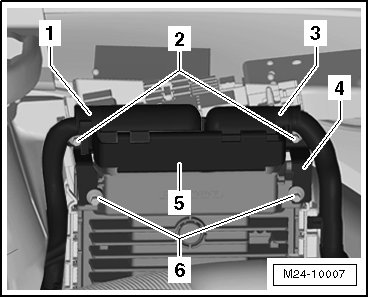
- Tighten the shear bolts - 6 - just enough until the bolt heads break off.
- Connect the connectors - 1 and 3 - to the ECM.
- Install the locking mechanism - 5 - with new shear bolts - 2 -.
- Tighten the shear bolts - 2 - just enough until the bolt heads break off.
- Install the E-box cover - arrows -.
- Install the air filter housing. Refer to => [ Air Filter Housing ] Air Filter Housing.